Mossberg Model 432 Rifle
By: Robert Dunn
I showed up to work one morning and found a Mossberg Model 432 on the bench and beside it was a Mossberg 4×32 scope! After breakfast, Bob Dunlap joined me in the shop. Neither one of us had ever seen a 432 and we both love .22 rifles. The Model 432 was manufactured in 1970 and 1971, along with the longer barreled Model 430, which had a Walnut stock with checkering and a pistol grip. The Model 333 came out in 1972 and was very similar to the 432. All three of these Mossberg rifles were tube fed and fired .22 LR cartridges.
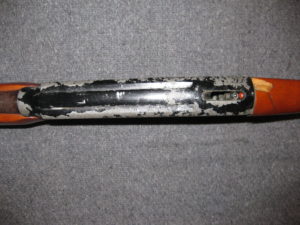
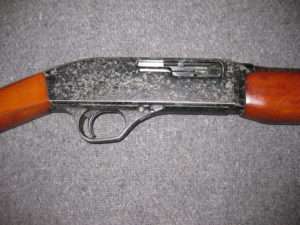
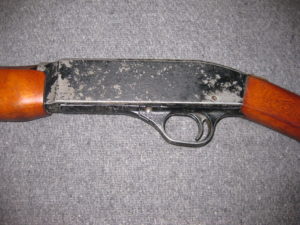
Bob and I looked the gun over to see what needed to be done to this old fellow to get him back into the shooting game. Bob told me that he had already sent its broken safety over to Ken Brooks to be TIG welded. The plastic part of the operating handle had been snapped in two and only a little nub was left to operate the bolt with. The rifle was spotted with rust in several areas and about 50 percent of the factory finish on the receiver was chipped away. The butt stock had a big chunk taken out of it up around where it meets the back of the receiver. One half of the chunk was apparently haphazardly glued back onto the stock and the other half was missing. The entire gun was in need of some serious attention!
I asked Bob if he wanted me to spruce it up a bit and fit the safety when we got it back from Ken. He told me what he wanted done to it, which wasn’t a whole lot and that I could do what I wanted with it. Well, I did quite a bit more than what he asked me to do! Over the years, Bob had been very generous to me. He always took time to answer my Gunsmithing questions and he was always quite honest with me when he saw how I could improve my work. I went out on a limb and restored this old rifle for Bob as a way to say thank you for his kindness. I knew that he would give me an honest evaluation of my work and my hope was to not make him angry because I destroyed his new Mossberg treasure!
The following story is my scary journey of bumbling my way to the completion of the restoration of my friend’s Model 432. The first thing that I did was to pick up the safety from Ken at PISCO. When I got home, I dissected the gun in the shop and took a look at all the parts laid out in front of me. The safety button was from some other Mossberg Model and the safety itself was going to take more time to fit than it would to simply buy a replacement. I needed to place what has now become my monthly Numrich Gun Parts order anyway. I purchased a new safety button, a safety lock, a safety detent ball and an operating handle.
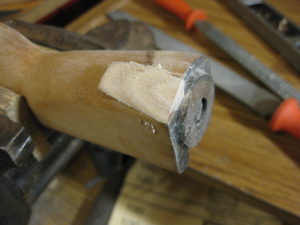
I was looking forward to getting the stock fixed. Bob and I talked about simply dressing down the wood chunk that was previously glued on crooked because it was part of the original wood., but decided against it. I looked around at my scrap pieces of wood and found a small block that matched the contour and color of the stock, so I fitted and glued it onto the front of the butt stock. I chose a piece of wood that was quite a bit bigger than the size that needed replaced so that I would have enough material to shape the new piece of wood to the stock. This would have worked out great if the rings in the wood didn’t get bigger and bigger as I shaped it to conform to the back of the receiver and the top of the butt stock! It still looked pretty good, so I sanded down the rest of the stock and forend, stained them and finished the job with Tung oil.

The parts had come in by the time I finished the wood work, so started the work on the gun itself. I put the gun together and it functioned correctly, so I disassembled it again and took the entire gun down to bare metal with sand paper and steel wool. Bob said that he liked my cold blue jobs, so he just wanted the gun cold blued. Before I began the cold bluing process, I grabbed a magnet to make sure everything was steel. My heart skipped a beat when I realized the receiver was made of aluminum! My mind raced back to my horrifying experiences with using various aluminum cold bluing products. I then decided that I was going to try Laurer Weaponry’s DuraBlue, which is a spray on coating similar to their DuraCoat finishes. To make a long story short, I am not the best at spray painting guns yet and I really didn’t want to screw up Dunlap’s rifle, as DuraBlue is extremely hard to take off even if you have a bead blaster and I don’t! Whilst waiting for the DuraBlue, I started yet another project, or should I say projects. I restored four rifles, two shotguns and a pistol before I got back on track with the 432 (luckily two of those projects were for Bob)!
During my hiatus from the Mossberg project, I had done a lot of sanding and grinding on wood, polymer and steel. I had also done a mess of cold bluing, spray painting, cleaning up moldy stocks and working with various corrosive chemicals. I woke up one morning and just felt goofy in the head, so I took some time off from Gunsmithing to research and buy a proper respirator. I ended up with a 3M 7162 Full-Facepiece Spray Paint Respirator that uses Organic Vapor Cartridges and it is wonderful! It is so easy to get on and off, it’s comfortable and it protects my eyes and my lungs.
Some of the small parts after being cold blued.
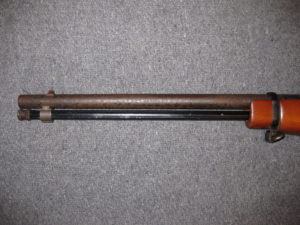
Bob wanted a sight slot blank put in the barrel to replace the rear sight that was missing, as he wanted to shoot this rifle with the Mossberg scope exclusively. So, I drove in the blank and tried my hand at spraying the gun using an Aerosol can of DuraBlue. My “spray room” is attached to the back of my house and is cold throughout the winter, which is when I sprayed the rifle. In the end, it took too many coats to cover all of the surfaces evenly and I ended up with some blemishes that I am not proud of. Under ideal conditions, it is possible to obtain a very nice looking finish with DuraBlue and I would use it again. I then cold blued some of the smaller parts like butt plate screws, the barrel band, safety button, sling swivels and a couple other screws.
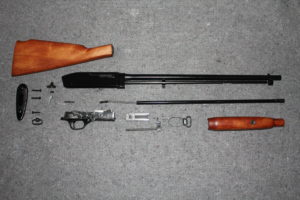
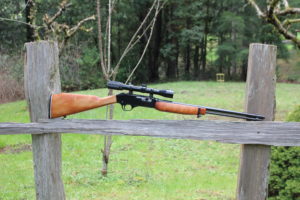
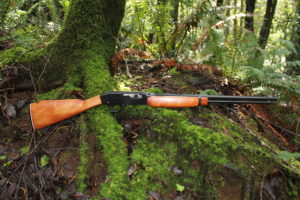
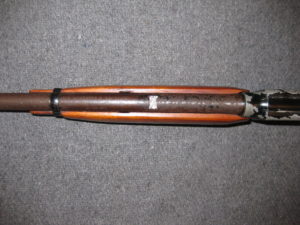
Mossberg Model 432 ready for reassembly!
The morning after spraying the parts, I assembled the rifle, test fired it several times and dropped it off on Bob’s workbench while he was at a Dentists appointment. I received a call later that night thanking me for returning a good looking rifle. Though we both agreed that the finish could have turned out better, he said that he was impressed with the overall job and liked the woodworking. This made me feel much better and gave me a boost of confidence. Once again, I can plainly see where I need improvement and that is with everything that I do, but I can also see that I am getting better with each project that I complete. Even though I am not thrilled with all of the results of my efforts, I am confident that this Model 432 looks much better than when I first saw it!